Updated 8 November 2026
Do zipper bags and stand-up pouches do the same job?
Both can have a reclosable closure, but the base, opening and filling method need checking on the actual pack. Explain whether the pack must stand on a shelf or simply hold small items. Share a sample of the contents and show how it will be filled. A zipper alone does not establish stand-up performance, airtightness, leak resistance or food-contact suitability.
Separate three decisions before choosing samples
One sample pack may have a zipper, a wide opening and a base that unfolds. Each feature solves a different problem. The closure affects how someone reopens the pack. The mouth determines how the contents enter it. The base affects the way the filled pack sits when set down. A purchase request that only says “zipper bag” does not tell the product team whether the bag must stand upright, how the contents will be inserted or where the pack goes after closing.
Describe the job in one sentence. “Hold small cards in a flat tray so we can reopen each bag to check the count” calls for a different discussion from “display a set of accessories upright with a label facing the aisle.” Both examples may call for a reclosable feature. The first puts the emphasis on retrieving a pack from a tray, while the second requires checking how the pack sits on a shelf. The choice still depends on the samples assessed for the job.
Sketch the base empty and with the intended contents
In the first sketch, show the two sides of a flat bag meeting at the bottom. In the second, show a pouch with a fold at the base that opens out into a surface that can touch a shelf. The drawings describe different shapes without setting a finished size or guaranteeing how a pack will sit. A base fold you can see on an empty sample does not show how evenly the pouch will stand once filled.
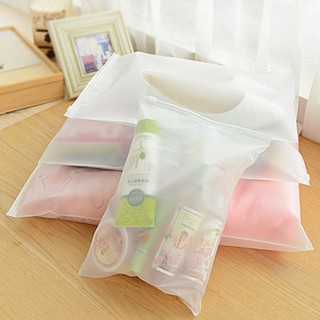
Put a filled sample on the shelf or other surface where it will be used. Check whether the base opens evenly, whether contents shift toward one corner and whether the front still faces the customer. Check it again with some contents removed if the pack will be opened and returned to the shelf. For a bag stored flat, note whether the stack prevents the tray from closing or makes it awkward for staff to take out a single pack. Record the outcomes separately because the shelf and tray serve different purposes.
Watch how the contents move through the mouth
The outer width is often the first figure a buyer reads. To assess filling, check the usable space that the item has to pass through, taking into account the side joints, the zipper position and the shape of the mouth. Insert the item in the orientation the operator will actually use. If it only goes in after rotating or bending it, record whether staff can perform that extra step consistently and whether the item changes shape after insertion.
The filling method also affects the dimensions worth discussing. A wide card needs a different path than several small components tipped in from a tray. If a filling aid is involved, send a picture and show how the aid sits relative to the mouth. Ask the product team to look at samples in that workflow before settling on a size. A successful hand fill on a workbench does not establish compatibility with other equipment or another procedure.
Allow room for closing and reopening
Once the pack is filled, check whether the contents still push against the closure area. Try closing the zipper along its full length the way staff will do it. Note any end that is difficult to reach and check whether a label, insert or part of the contents folds into the closing path. If the customer will open the pack, let someone who has not handled the sample find the opening. This helps distinguish an access problem from a bag size problem.
Explain whether the zipper will be used only after first opening or will be the sole way the pack is closed as soon as it is filled. If the project also needs an initial seal, separately describe which part must remain intact before opening, what process will be used and what evidence is required. Being able to close a zipper by hand does not establish seal integrity, protection against moisture or performance in shipping.
Compare two samples with the same contents and purpose
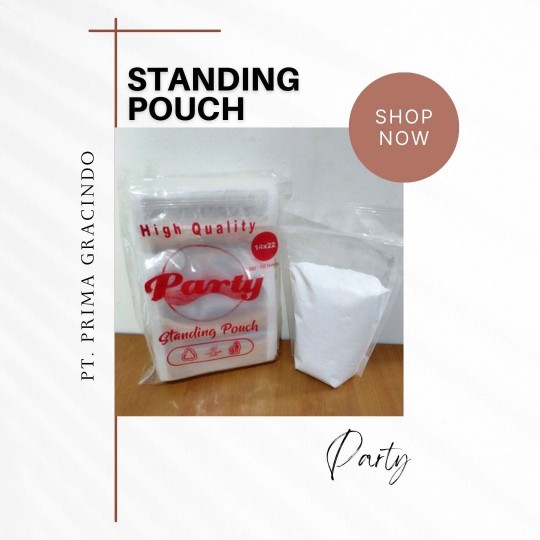
Suppose a retailer wants to sell a kit made up of a card and some small accessories. In the first sample, the card gives shape to a flat bag stored in a tray. Staff check whether it can be inserted without bending it and whether the accessories catch below the zipper. In the second sample, the team tries an upright pouch on a shelf. They check whether the accessories move to one side and tilt the front or whether the card obstructs the label area.
Use the same arrangement of contents in each sample. Take front and side pictures once they are closed, label each sample and note where it was placed. The decision does not have to produce one format for every task. If a pack must work on a shelf and in a tray, check each candidate in both positions before deciding which format to discuss further.
Agree on acceptance criteria before looking at samples
Decide what makes a sample worth taking forward before comparing the two formats. For a tray, check whether staff can take one pack out without lifting the pack next to it and remove the card without creasing it. For a display, see whether the label remains visible when another pack stands beside it. Consider what happens when merchandise is rearranged while the shop is open. If a shape meets the shelf criteria but is difficult to fill, write down the provisional decision and the open question. The purchasing team can then ask for a better insertion path without discarding the whole base or closure concept.
Turn your observations into a product brief
| Feature | Information to share |
|---|---|
| Base | Bottom and side photos after filling, shelf or tray position, and any leaning area |
| Opening | The largest item shown in its insertion direction, any point that catches, and where the opening was measured |
| Filling | Insertion order, any filling aid, and the quantity in each pack |
| Closure | Space left under the zipper, need for reopening, and any initial seal requirement |
| Use | Contents, intended storage conditions, specific requirements and open questions |
Include units on measurements and specify whether each number describes the outside, the usable opening or the space from the bottom to the closure. Include a sample of the largest item and, if shapes vary, one item that is hardest to insert. Describe what you can observe, such as “the corner of the card touches the zipper when we close the pack.” That gives the product team more to work with than “the bag is too tight.”
If the contents require food-contact documentation, protection from air or moisture, or leak testing, state the requirements and actual conditions of use. Do not infer the result from the appearance of the layers, the words “stand-up pouch” or the presence of a zipper. See the Cave Mekar Group zipper bag and stand-up pouch pages for the two categories. For purchasing enquiries, take the brief and sample photos to the team through the Bliplastik catalogue in Indonesian.
Frequently asked questions
Can every zipper bag stand up?
No. Check the shape of the base and how the filled sample sits on the intended surface.
Is the outer width the same as the usable opening?
Not necessarily. Measure the opening the item can actually pass through and mark its orientation during filling.
Does every stand-up pouch have a zipper?
No. Confirm the type of closure and how the actual variant opens.
Does a zipper prove the pack is airtight or suitable for food?
No. Performance and suitability need confirming for the specific product and conditions of use.
What information helps most when requesting samples?
Send a sample of the contents, the filling direction, storage or display position, closure requirements and measurements with clear units.